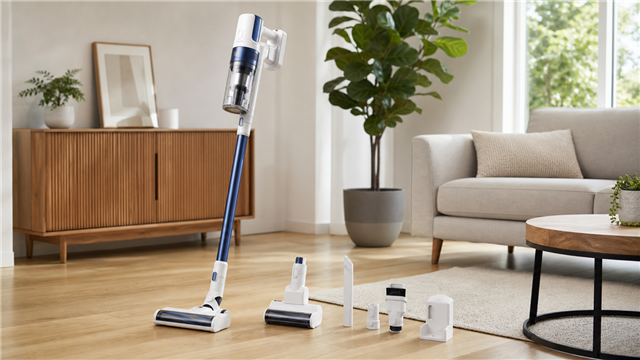
 The Tineco Floor One S3 is a popular cordless hard floor cleaner that combines vacuuming and mopping into one efficient device. It’s designed to make cleaning your floors easier and faster, but before you can start using it, you need to assemble it properly. If you’ve just unboxed your Tineco Floor One S3 and are wondering how to put it together, you’ve come to the right place. In this guide, we’ll walk you through the entire assembly process, step by step, so you can get your new cleaning companion up and running in no time.
What’s in the Box?
Before diving into the assembly process, it’s important to familiarize yourself with the components included in the Tineco Floor One S3 package. Here’s what you’ll typically find inside:- Main Unit: The body of the Floor One S3, which houses the motor, battery, and controls.
- Water Tank: A detachable tank for clean water.
- Dirty Water Tank: A separate tank for collecting dirty water and debris.
- Roller Brush: The main cleaning brush that vacuums and mops simultaneously.
- Handle: The long handle that attaches to the main unit.
- Charging Dock: The station where you can charge and store your Tineco Floor One S3.
- Accessories: This may include a cleaning tool, extra filters, and a user manual.
Step 1: Attach the Handle to the Main Unit
The first step in assembling your Tineco Floor One S3 is to attach the handle to the main unit. Here’s how to do it:- Locate the Handle Slot: On the main unit, you’ll see a slot where the handle is meant to fit. It’s usually at the top of the device.
- Align the Handle: Take the handle and align it with the slot. Make sure the connectors on the handle match the ones on the main unit.
- Push and Click: Gently push the handle into the slot until you hear a clicking sound. This indicates that the handle is securely attached.
Step 2: Install the Roller Brush
The roller brush is a crucial component of the Tineco Floor One S3, as it’s responsible for both vacuuming and mopping. Here’s how to install it:- Flip the Main Unit: Turn the main unit upside down so you can access the roller brush compartment.
- Open the Compartment: Locate the latch or button that opens the roller brush compartment. Press it to release the cover.
- Insert the Roller Brush: Take the roller brush and slide it into the compartment. Make sure the brush is properly aligned with the grooves inside.
- Close the Compartment: Once the roller brush is in place, close the compartment cover and ensure it’s securely latched.
Step 3: Attach the Water Tanks
The Tineco Floor One S3 uses two separate water tanks: one for clean water and one for dirty water. Here’s how to attach them:Clean Water Tank
- Locate the Clean Water Tank Slot: On the back of the main unit, you’ll see a slot for the clean water tank.
- Fill the Tank: Before attaching the tank, fill it with clean water. You can also add a small amount of Tineco’s cleaning solution if desired.
- Attach the Tank: Slide the clean water tank into the slot until it clicks into place.
Dirty Water Tank
- Locate the Dirty Water Tank Slot: The dirty water tank is usually located on the front of the main unit.
- Attach the Tank: Simply slide the dirty water tank into its slot until it clicks.
Step 4: Charge the Battery
Before using your Tineco Floor One S3 for the first time, it’s important to charge the battery fully. Here’s how:- Place the Device on the Charging Dock: Position the main unit on the charging dock, ensuring the charging connectors align.
- Plug in the Charger: Connect the charger to the dock and plug it into a power outlet.
- Wait for a Full Charge: The LED indicators on the device will show the charging progress. A full charge typically takes a few hours.
Step 5: Power On and Test
With everything assembled and charged, it’s time to power on your Tineco Floor One S3 and test it out:- Press the Power Button: Locate the power button on the handle or main unit and press it to turn on the device.
- Check the Water Flow: Ensure that water is flowing from the clean water tank to the roller brush. You should see a light mist on the floor as you move the device.
- Test the Suction: Run the Tineco Floor One S3 over a small area of your floor to check the suction and mopping functions.
Tips for Maintaining Your Tineco Floor One S3
To keep your Tineco Floor One S3 in top condition, follow these maintenance tips:- Empty the Dirty Water Tank After Each Use: This prevents odors and ensures the tank is ready for the next cleaning session.
- Clean the Roller Brush Regularly: Remove the roller brush and rinse it under running water to remove dirt and debris.
- Replace Filters as Needed: Over time, the filters may become clogged. Check them regularly and replace them when necessary.
- Store Properly: When not in use, store your Tineco Floor One S3 on its charging dock to keep it charged and ready.
Troubleshooting Common Issues
Even with proper assembly, you may encounter some issues with your Tineco Floor One S3. Here are a few common problems and how to fix them:Device Won’t Turn On
- Check the Battery: Ensure the battery is fully charged.
- Inspect the Connections: Make sure the handle is securely attached and the connectors are clean.
Poor Suction or Water Flow
- Clean the Roller Brush: A clogged roller brush can affect performance.
- Check the Water Tanks: Ensure the clean water tank is filled and the dirty water tank isn’t full.
Unusual Noises
- Inspect the Roller Brush: Remove the roller brush and check for obstructions.
- Tighten Loose Parts: Ensure all components are securely attached.