Owning a Tineco vacuum brings powerful cleaning convenience to your home, but what if you can’t or don’t want to use the wall mount? Whether you’re renting and can’t drill holes, prefer flexibility in storage, or simply want alternative charging solutions, you’re in the right place. This comprehensive guide shows you exactly how to charge your Tineco vacuum without a wall mount, ensuring your cleaning routine never skips a beat.
Why Skip the Wall Mount for Your Tineco?
Before diving into charging methods, let’s understand why many Tineco owners choose alternatives to wall mounting:
- Rental Property Restrictions: Most landlords prohibit drilling holes in walls. Even adhesive mounts can leave marks that violate lease agreements and affect security deposits.
- Flexibility in Storage: Wall mounts lock your vacuum to one location. Alternative charging gives you freedom to store and charge your Tineco wherever it’s most convenient—garage, closet, laundry room, or utility area.
- Aesthetic Preferences: Not everyone wants their cleaning tools on display. Discreet charging options help maintain your home’s visual appeal without sacrificing functionality.
- Multiple Cleaning Zones: If you clean different floors or areas, portable charging lets you move your vacuum station wherever needed without permanent installation.
Understanding Your Tineco Charging System
Most Tineco vacuums, including popular models like the A10, A11, Pure One series, and S12, offer flexible charging options built right into their design.
Direct Charging Port
The majority of Tineco models feature a charging port directly on the battery or vacuum body. This port accepts the power adapter independently of any docking station, making wall-mount-free charging completely feasible.
Standalone Docking Station
Some Tineco models include a docking station that doesn’t require wall mounting. These freestanding docks can be placed on any flat surface and function identically to wall-mounted versions, providing both charging and storage capabilities.
Step-by-Step: How to Charge Tineco Vacuum Without Wall Mount
Method 1: Direct Power Adapter Charging
This is the simplest and most flexible method for charging your Tineco vacuum without wall mounting.
Step 1: Locate Your Charging Components
Find the power adapter that came with your Tineco vacuum. It consists of a power cord with a wall plug on one end and a circular connector on the other.
Step 2: Choose Your Charging Location
Select a stable, flat surface near an electrical outlet. Ideal locations include:
- Kitchen or bathroom countertops
- Garage workbenches
- Laundry room shelves
- Closet floors with outlet access
- Table or desk surfaces
Ensure the area is dry, well-ventilated, and away from heat sources or direct sunlight. Avoid high-traffic zones where the vacuum might be bumped or disconnected during charging.
Step 3: Prepare the Charging Cable
Straighten the charging cable to prevent kinks or tangles. These can interfere with electrical flow and potentially damage the cord over time.
Step 4: Connect to Power Source
Plug the power adapter into a functional electrical outlet first. This sequence prevents potential power surges when connecting to your vacuum.
Step 5: Connect to Vacuum
Insert the charging connector into the charging port on your Tineco vacuum’s battery or main body. You’ll typically find this port near the battery compartment. Push firmly until you hear a click or feel the connection secure.
If your Tineco has a removable battery, you can charge it separately by removing it from the vacuum body and connecting the charger directly to the battery unit.
Step 6: Verify Charging Status
Check the LED indicator lights on your vacuum:
- Flashing or blinking lights: Battery is actively charging
- Solid lights: Charging is complete
- No lights: Check all connections and outlet functionality
Most Tineco models take 3-4 hours for a complete charge from empty to full capacity.
Step 7: Safe Storage After Charging
Once fully charged, unplug the adapter from both the outlet and vacuum. Store your Tineco in a cool, dry location away from temperature extremes. The ideal storage temperature range is 39°F to 102°F (4°C to 40°C).
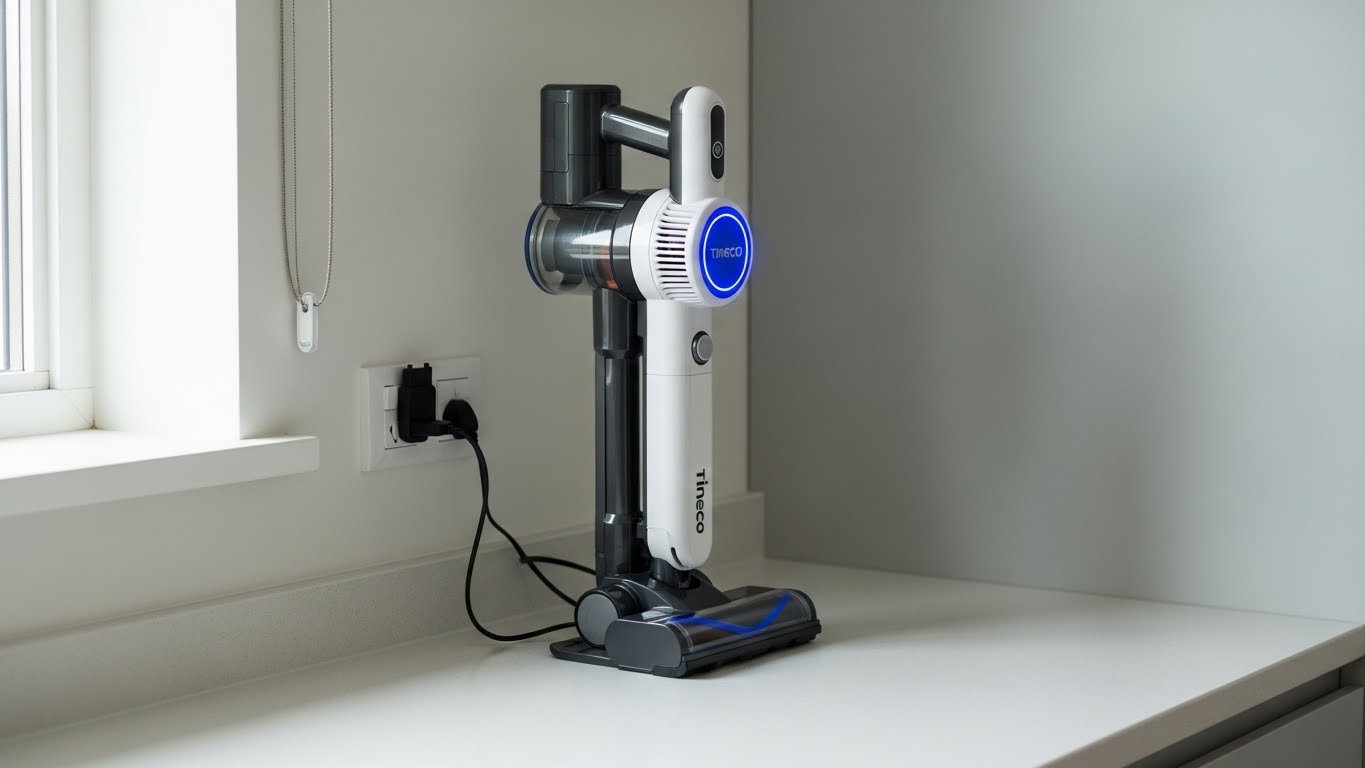
Method 2: Flat-Surface Docking Station Setup
If your Tineco came with a charging dock, you can use it without wall mounting.
Step 1: Assess Your Docking Station
Examine the charging dock that came with your vacuum. Most Tineco docks have mounting holes for walls but function perfectly on flat surfaces.
Step 2: Select Placement Location
Choose a stable, level surface with these characteristics:
- Close proximity to electrical outlet (within 6 feet)
- Adequate floor space (approximately 15×13 inches)
- Low foot traffic to prevent accidental bumps
- Away from moisture and heat sources
Step 3: Position the Dock
Place the charging dock flat on your chosen surface. The dock’s base should sit completely level to ensure proper contact between charging pins and vacuum connectors.
Step 4: Connect Power
Plug the dock’s power adapter into a wall outlet. Some docks have indicator lights that illuminate when receiving power.
Step 5: Dock Your Vacuum
Align your Tineco vacuum with the charging dock’s connectors. Slide the vacuum upward slightly to ensure metal charging contacts touch properly. You may need to adjust the angle for optimal connection.
Step 6: Confirm Charging
Watch for the charging indicator on your vacuum. The dock should automatically begin charging once proper contact is established.
Method 3: Using a Power Strip for Multi-Device Charging
For homes with limited outlets or multiple charging needs, a power strip offers an organized solution.
Step 1: Select Quality Power Strip
Choose a multi-outlet power strip with:
- Surge protection to guard against power spikes
- At least 6-foot cord length for placement flexibility
- Individual outlet spacing for larger adapters
- Built-in circuit breaker for safety
Step 2: Strategic Placement
Position your power strip on or near your charging surface. Secure it with adhesive strips or mounting clips if desired (these don’t require wall drilling).
Step 3: Connect and Charge
Plug your Tineco’s power adapter into one of the power strip outlets. Connect the adapter to your vacuum as described in Method 1.
Step 4: Organize Cables
Use cable ties or clips to manage cords neatly, preventing tripping hazards and maintaining a clean appearance.
Optimizing Battery Life: Essential Charging Practices
How you charge impacts your Tineco’s battery longevity and performance.
1. Charge Regularly, Not Completely Empty
Don’t wait until your battery is completely depleted. Charge when battery levels drop to 20-30% remaining. This practice prevents deep discharge cycles that accelerate battery degradation.
2. Avoid Overcharging
While Tineco vacuums have built-in overcharge protection, it’s still best practice to unplug once fully charged. This reduces unnecessary heat generation and extends overall battery lifespan.
3. Temperature Matters
Always charge at room temperature. Extreme cold or heat during charging can damage battery cells and reduce capacity. If your vacuum has been in a cold garage or hot car, let it reach room temperature before charging.
4. Monthly Maintenance Charges
If you don’t use your Tineco frequently, charge the battery to at least 50% once every three months. This maintains battery health during storage periods.
5. Clean Charging Contacts
Dirt and debris on charging contacts can interfere with proper charging. Monthly, gently wipe both the vacuum’s charging port and dock connectors with a dry, soft cloth.
Alternative Charging Accessories to Consider
Enhance your wall-mount-free charging setup with these options:
1. Portable Charging Stands
Third-party manufacturers offer freestanding charging stands specifically designed for Tineco models. These lightweight, portable stands provide stability during charging and don’t require any installation.
2. Spare Battery Systems
Consider purchasing an additional Tineco battery. While one battery charges, you can use the vacuum with the second battery, ensuring uninterrupted cleaning sessions. Most Tineco models support separate battery charging in their docking stations.
3. Custom Storage Solutions
Create a dedicated charging station using a small rolling cart, utility shelf, or storage ottoman. These solutions organize your vacuum, charger, and accessories in one mobile unit.
4. Extension Cords (Use Cautiously)
If your outlet is far from your preferred charging location, use a heavy-duty extension cord rated for your vacuum’s power requirements. However, direct outlet connection is always preferable for safety and charging efficiency.
Troubleshooting Common Charging Issues
Even without a wall mount, you might encounter charging challenges. Here’s how to address them:
1. Vacuum Won’t Charge
- Check the power source: Test the outlet with another device to confirm it’s functioning. Try a different outlet if needed.
- Inspect connections: Ensure the power adapter is firmly connected to both the outlet and vacuum. Loose connections prevent charging.
- Clean charging contacts: Dust, lint, or debris can block electrical contact. Use a soft, dry cloth or cotton swab to clean both the charging port and adapter connector.
- Examine the cable: Look for visible damage, fraying, or kinks in the charging cable. A damaged cable requires replacement.
2. Charging Indicator Light Not Working
- Verify proper connection: Even if plugged in, poor contact prevents charging. Adjust the connection angle slightly and watch for indicator activation.
- Reset the vacuum: Some Tineco models benefit from a reset. Unplug everything, press and hold the power button for 10-15 seconds, then reconnect and attempt charging again.
- Check battery health: If your Tineco is several years old, the battery may have reached the end of its lifespan and require replacement.
3. Slow or Incomplete Charging
- Outlet voltage issues: Weak electrical supply can slow charging. Try a different outlet, preferably one not shared with high-power appliances.
- Temperature factors: Charging in very cold or hot environments slows the process. Charge at room temperature for optimal speed.
- Battery age: Older batteries naturally charge more slowly and hold less capacity. Consider battery replacement after 2-3 years of regular use.
4. Battery Drains Quickly After Charging
- Calibration needed: Occasionally, the battery’s charge indicator becomes uncalibrated. Fully discharge the vacuum, then charge completely without interruption to recalibrate.
- Excessive suction mode use: Using Max or High power modes constantly drains batteries faster. Use Auto or Standard modes for routine cleaning.
- Filter maintenance: Clogged filters force the motor to work harder, draining battery faster. Clean or replace filters according to your model’s maintenance schedule.
Safety Considerations for Wall-Mount-Free Charging
Charging without a wall mount requires attention to safety details:
- Stable Surface Requirements: Always charge on surfaces that cannot tip or shift. An unstable vacuum could disconnect mid-charge or fall, potentially damaging the unit.
- Proper Ventilation: Batteries generate heat during charging. Ensure adequate airflow around your vacuum. Never charge inside closed cabinets, drawers, or covered spaces.
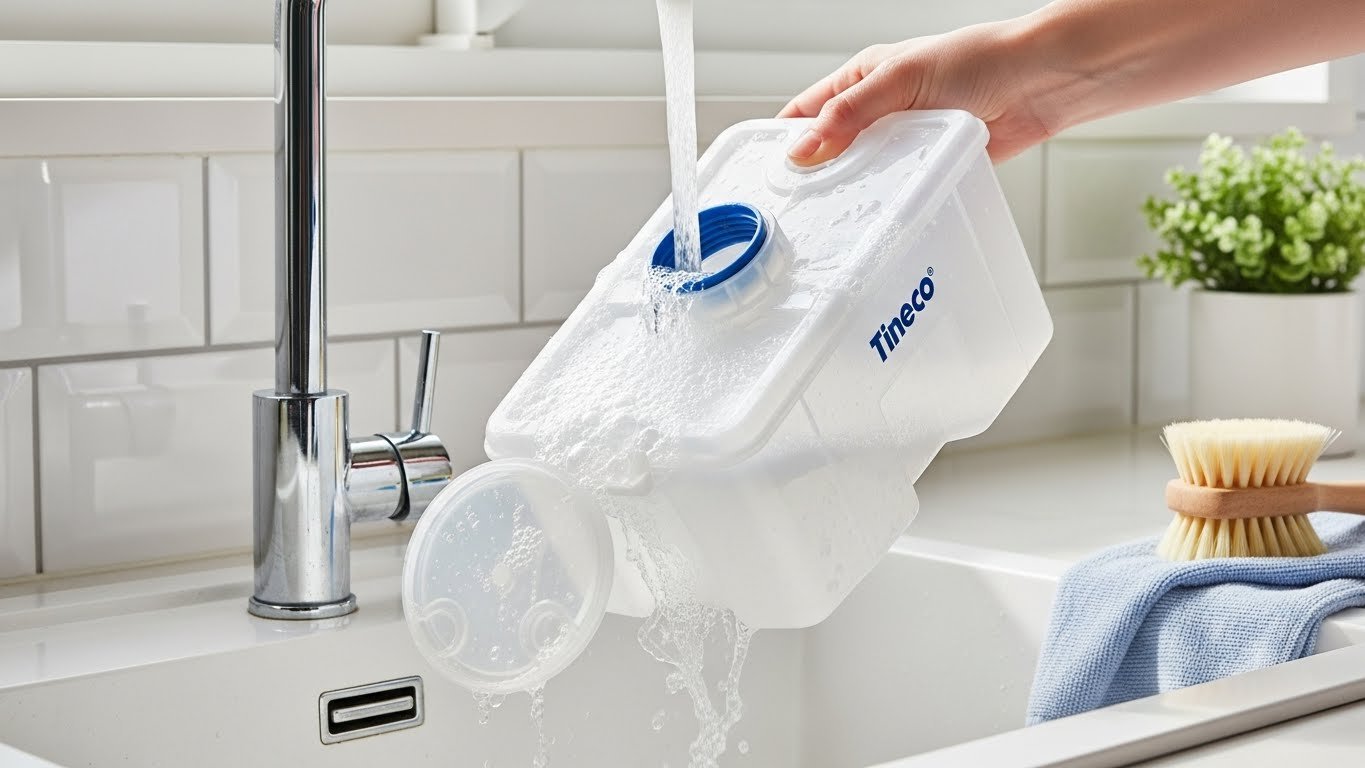
- Keep Away From Water: Despite being designed for floor cleaning, Tineco vacuums should never charge near water sources, sinks, or in humid bathroom environments.
- Original Chargers Only: Third-party or generic chargers may not meet Tineco’s voltage and amperage specifications. Using incorrect chargers risks battery damage, fire hazards, or voiding your warranty.
- Child and Pet Safety: Place charging vacuums out of reach of children and pets who might pull on cords or knock over the unit.
- Don’t Charge Unattended for Extended Periods: While overcharge protection exists, it’s prudent not to leave your vacuum charging overnight or when you’re away from home for extended periods.
Model-Specific Charging Considerations
Different Tineco models have unique charging characteristics:
1. Tineco A10 and A11 Series
These models feature direct battery charging ports and are compatible with standalone docking stations. The A11 typically includes a second battery charging slot in its dock, allowing simultaneous charging of two batteries without wall mounting.
2. Tineco Pure One S11/S12 Series
The Pure One series commonly includes wall-mounted docks but functions identically when placed on flat surfaces. These models charge in approximately 3.5 hours and feature clear LED battery indicators.
3. Tineco Floor One and iFloor Series
These wet/dry vacuum models have slightly different charging requirements. Their charging docks are heavier and more stable on flat surfaces, making wall-mount-free charging particularly practical.
4. Tineco S15 Pro and Newer Models
Recent Tineco models often include quick-charge technology, reducing charging time to 2-3 hours. These advanced systems have enhanced overcharge protection, making them safer for various charging setups.
Frequently Asked Questions
Can I use my Tineco vacuum while it’s charging?
No, Tineco vacuums cannot operate while connected to the charger. The charging system requires a stationary connection, and using the vacuum during charging could damage the battery or create safety hazards.
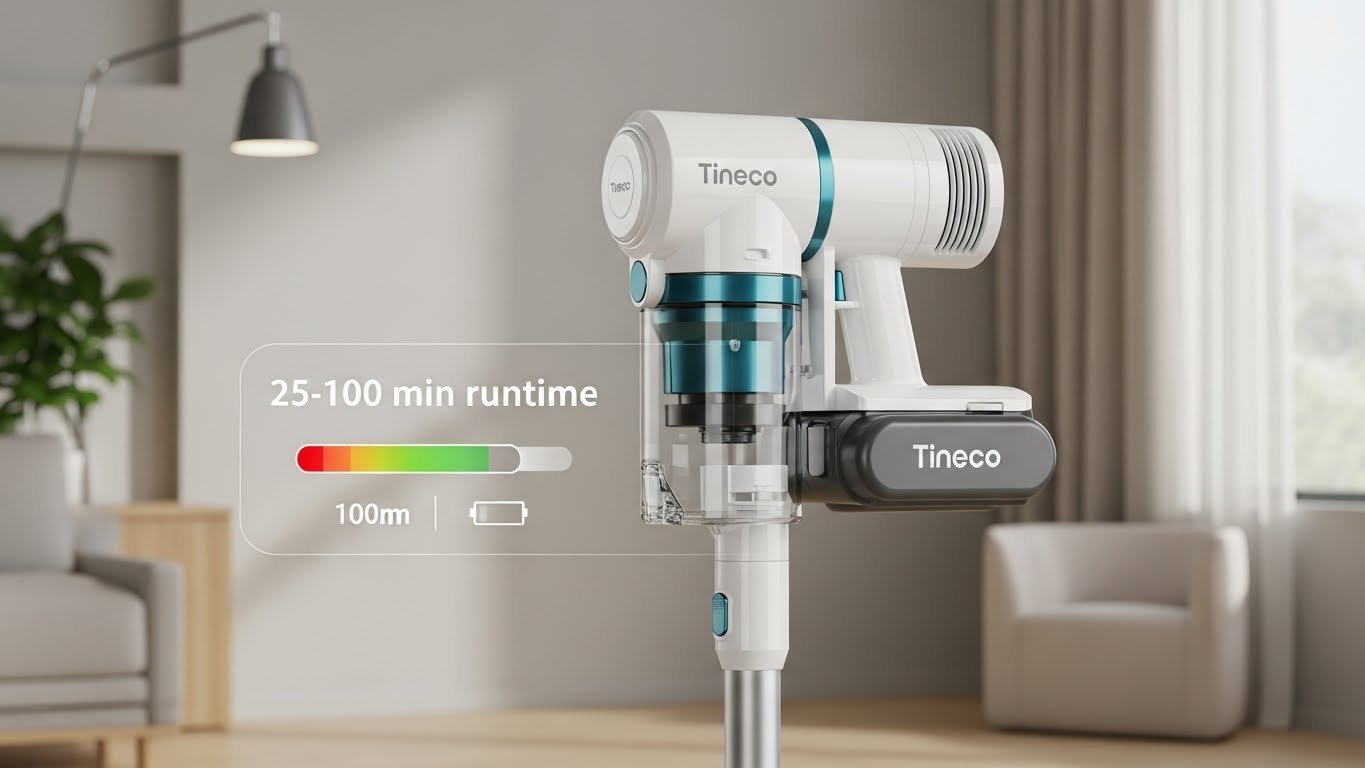
How long does a Tineco battery last per charge?
Most Tineco models provide 20-60 minutes of runtime depending on the power mode used. Auto mode typically offers 40-50 minutes, while Max mode provides 15-20 minutes of intensive cleaning power.
Do I need to wall mount the Tineco for proper charging?
No, wall mounting is optional for charging. The wall mount provides convenient storage and organization but isn’t necessary for the charging function. Your Tineco charges equally well using the methods outlined in this guide.
Can I charge just the battery separately from the vacuum?
Yes, most Tineco models allow battery removal for separate charging. This feature is particularly useful if you have multiple batteries or want to charge the battery in a different location from where you store the vacuum body.
What voltage does the Tineco charger use?
Tineco chargers typically output 26V DC at 0.8A. Always verify your specific model’s requirements in the user manual. Using incorrect voltage can permanently damage your vacuum’s battery.
How often should I replace my Tineco battery?
With proper care, Tineco batteries last 2-4 years. Signs that replacement is needed include rapid discharge, failure to hold a charge, or significantly reduced runtime even after full charging.
Conclusion
Charging your Tineco vacuum without a wall mount opens up flexibility and convenience in your cleaning routine. Whether you choose direct adapter charging, flat-surface docking, or a power strip setup, these methods deliver the same reliable performance as traditional wall mounting.
Remember the key principles: use original equipment, charge on stable flat surfaces, maintain battery health through regular charging cycles, and prioritize safety in your charging location selection. By following this guide, you’ll keep your Tineco vacuum powered and ready for action, regardless of your living situation or storage preferences.
Your Tineco’s innovative design makes wall-mount-free charging not just possible, but practical and efficient. Embrace the flexibility that comes with portable charging solutions and enjoy spotless floors on your terms.