Your Tineco wet dry vacuum is an investment in cleaner floors and a healthier home. But like any hardworking cleaning tool, it needs regular maintenance to keep performing at its best. Knowing how to clean Tineco wet dry vacuum properly can extend its lifespan, prevent odors, and ensure optimal cleaning power. Whether you own a Floor One S5, S6, S7, or iFloor 3, this comprehensive guide will walk you through every cleaning step.
Why Regular Cleaning of Your Tineco Vacuum Matters
Before diving into the how-to, let’s understand why cleaning your Tineco wet dry vacuum is essential. These smart floor washers combine vacuuming and mopping in one pass, which means they handle dirt, hair, liquids, and debris constantly. Without proper maintenance, several issues can arise.
A clogged brush roller reduces suction power and cleaning efficiency. When hair and debris accumulate, your vacuum must work harder, straining the motor and potentially shortening its lifespan. Additionally, trapped moisture and organic matter create the perfect breeding ground for bacteria and mold, leading to unpleasant odors that can permeate your home.
The dirty water tank and filters can harbor bacteria if not cleaned regularly. Studies show that poorly maintained cleaning tools can spread more germs than they remove. Regular maintenance ensures your Tineco continues protecting your family’s health rather than compromising it.
Understanding Your Tineco Wet Dry Vacuum Components
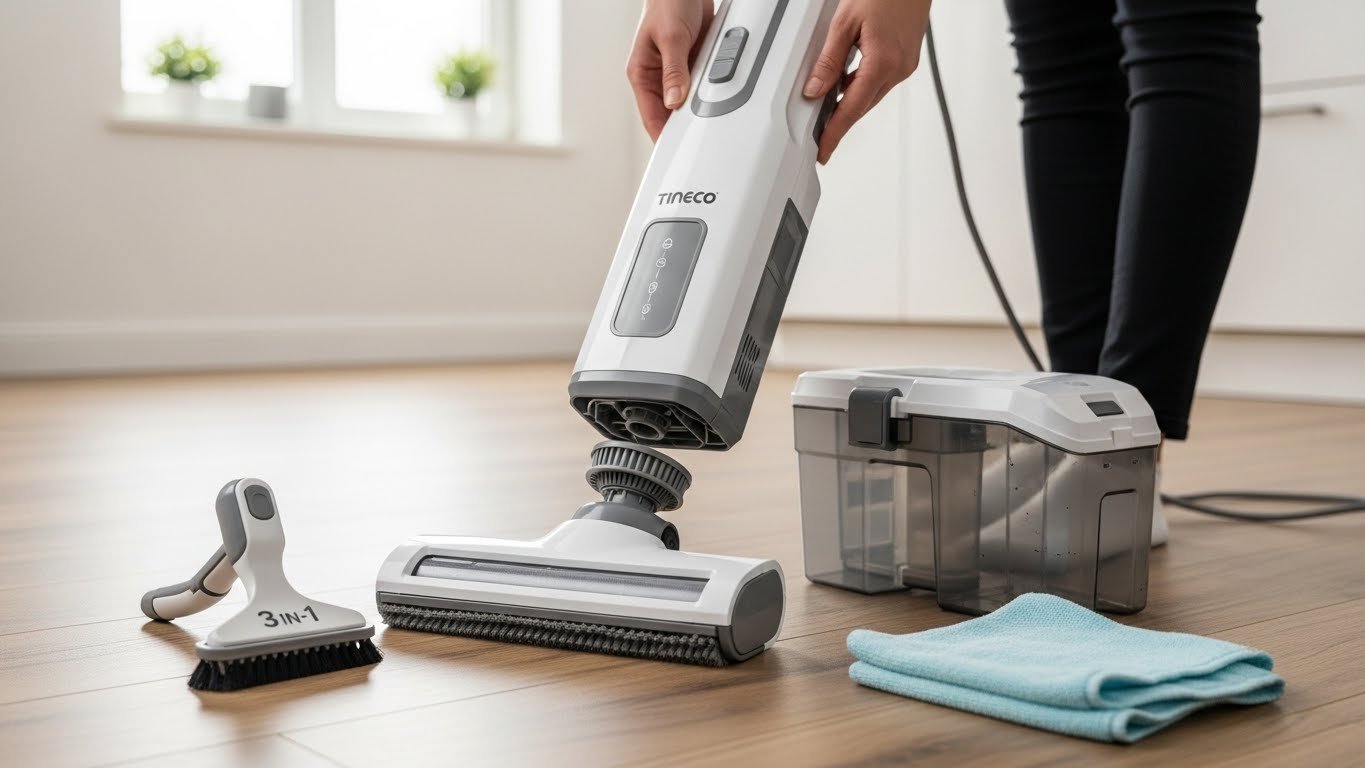
Before you start cleaning, familiarize yourself with the key components that require regular attention. Most Tineco models share similar parts, though specific designs may vary slightly.
Key Components to Clean
The dirty water tank (DWT) collects all the dirty water, debris, and hair from your floors. It typically has a filter and floater inside that prevent overflow. The clean water tank (CWT) holds fresh water and cleaning solution that sprays onto your floors during operation.
The brush roller is the cylindrical component with bristles that scrubs your floors while spinning. This part requires the most frequent cleaning as it directly contacts dirt and hair. The roller cover protects the brush roller and can accumulate debris around its edges.
The filters (HEPA or dry filters depending on your model) trap fine particles and prevent them from recirculating into your home. The charging base or storage tray is where you place your vacuum for charging and self-cleaning.
How to Use the Self-Cleaning Mode on Your Tineco
One of the most convenient features of Tineco wet dry vacuums is the built-in self-cleaning function. This automated cycle cleans the brush roller and internal tubing without requiring you to disassemble anything.
Step-by-Step Self-Cleaning Instructions
Start by ensuring your vacuum is plugged in and placed on the charging base or storage tray. Make sure the dirty water tank is empty or has room for more water, and verify that the clean water tank is at least one-third full of fresh water.
Locate the self-cleaning button, usually positioned at the top of the handle and marked with a brush or water droplet icon. Press and hold this button for a few seconds until the cleaning cycle begins. You’ll hear the motor activate and water flowing through the system.
The self-cleaning cycle runs automatically for approximately 40 seconds on most models. During this time, water and solution flush through the brush roller and internal pathways, removing debris and dirt. The vacuum will shut off automatically when the cycle completes.
After the self-cleaning cycle finishes, remove the dirty water tank and dispose of the dirty water. Rinse the tank thoroughly under running water to prevent odor buildup.
When to Use Self-Cleaning Mode
For optimal maintenance, activate self-cleaning mode after every use of your Tineco vacuum. This habit prevents debris from drying and hardening inside the machine. If you’ve cleaned particularly dirty areas or encountered heavy pet hair, consider running the self-cleaning cycle twice for more thorough results.
Deep Cleaning the Dirty Water Tank
While the self-cleaning mode handles basic maintenance, the dirty water tank needs regular manual cleaning to prevent bacterial growth and eliminate odors.
1. Removing and Emptying the Tank
Turn off your Tineco vacuum and press the tank release button. Carefully remove the dirty water tank by pulling it straight out. Hold the tank over a toilet or sink and lift the lid to empty the contents. Use the included cleaning tool to scrape out any remaining solid debris.
2. Cleaning Tank Components
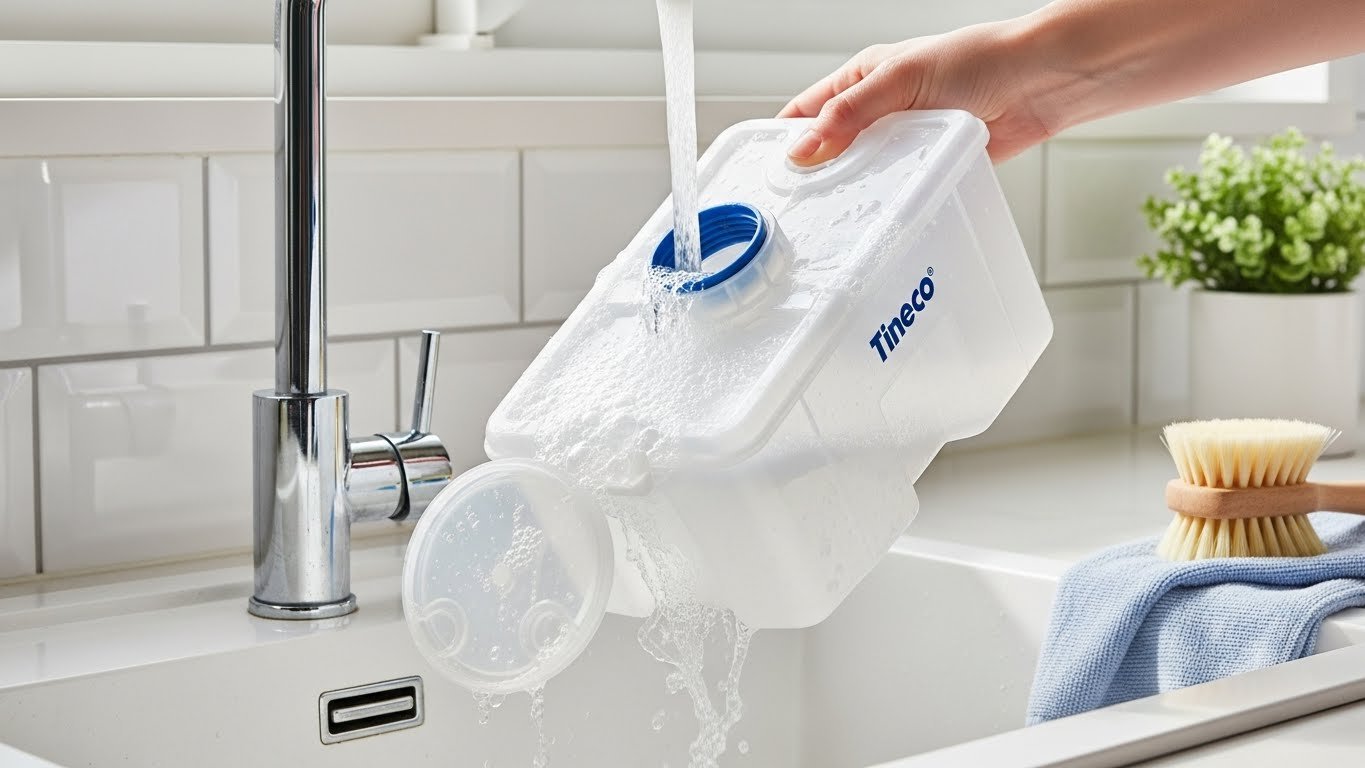
Remove the filter from the tank lid by grasping it and pulling upward. Most Tineco models include a floater mechanism that also needs removal and cleaning. Rinse both the filter and floater under cool running water until all debris washes away.
Wash the inside of the tank thoroughly with warm water. For stubborn residue or odors, add a few drops of mild dish soap and scrub with a soft brush. Avoid using hot water, as temperatures above 104°F (40°C) can damage tank components.
3. Drying and Reassembly
This step is crucial for preventing mold and mildew. After rinsing all components, shake off excess water and place them in a well-ventilated area to air dry completely. The filter must be absolutely dry before reinstallation—this typically takes 24 hours.
Once everything is dry, reassemble the filter and floater back onto the tank lid, then insert the clean dirty water tank back into your vacuum until you hear it click into place.
Cleaning the Brush Roller: Step-by-Step Guide
The brush roller is your Tineco’s workhorse, and it accumulates the most dirt, hair, and debris. While self-cleaning handles light maintenance, manual cleaning ensures thorough care.
1. Removing the Brush Roller
Power off your vacuum and unplug it from the charging base. Locate the brush roller cover on the underside of the vacuum head. Most Tineco models have a simple release mechanism—press the tabs on both sides and lift the cover away.
Grasp the brush roller at both ends and pull it straight out of its housing. You may notice it’s wrapped with hair, strings, and other debris—this is normal and exactly why manual cleaning is necessary.
2. Removing Debris and Hair
Start by using scissors or a seam ripper to carefully cut through any tangled hair wrapped around the roller. Cut along the length of the roller, taking care not to damage the bristles. Once cut, you can easily pull the hair away.
Use the Tineco cleaning tool or an old toothbrush to remove remaining debris lodged between the bristles. Work methodically from one end to the other, ensuring you dislodge all trapped particles.
3. Washing the Brush Roller
Fill a basin with lukewarm water and add a small amount of mild dish soap. Submerge the brush roller and let it soak for 5-10 minutes to loosen stubborn dirt. Use a soft brush to scrub the bristles gently, working the soap through all areas.
Rinse the roller thoroughly under running water until all soap residue is gone. Squeeze out excess water gently—never wring or twist the roller, as this can damage the bristle structure and internal components.
4. Drying and Reinstalling
Shake off excess water and place the roller in a well-ventilated area to air dry completely. This process typically takes 24 hours. You can speed drying by using a fan (not a hairdryer, as excessive heat damages the bristles).
Installing a damp roller promotes bacteria growth and causes odors, so patience is essential. Once completely dry, align the roller with its housing and push it firmly into place until it clicks. Replace the roller cover, ensuring it snaps securely.
Maintaining the Clean Water Tank
The clean water tank requires less intensive cleaning than the dirty water tank, but regular attention prevents mineral buildup and ensures proper water flow.
Weekly Maintenance
Empty any remaining water from the clean water tank after each use. Rinse the tank interior with fresh water and allow it to air dry with the lid off. This prevents stagnant water and potential bacterial growth.
Monthly Deep Cleaning
Once monthly, mix equal parts white vinegar and water and fill the clean water tank. Let this solution sit for 15 minutes, then rinse thoroughly with fresh water multiple times until the vinegar smell dissipates.
Check the spray nozzles on the bottom of the tank for mineral deposits or blockages. Use a fine needle to gently clear any obstructions, ensuring optimal water flow during cleaning sessions.
Filter Maintenance and Replacement
Tineco vacuums typically include HEPA or dry filters that trap fine particles. These filters require regular cleaning and eventual replacement to maintain suction power and air quality.
Cleaning the Filter
Remove the filter according to your model’s instructions—usually by grasping the recessed areas and pulling upward. Tap the filter gently to dislodge loose debris, then rinse under cool running water. Never use hot water, as it can damage the filter material.
Hold the filter under the faucet and gently massage it to remove trapped particles. Continue rinsing until the water runs clear. Shake off excess water and allow the filter to air dry completely in a well-ventilated area for 24 hours.
When to Replace Filters
Even with regular cleaning, filters have a limited lifespan. Replace your Tineco filter every 3-6 months depending on usage frequency. Signs that replacement is needed include persistent reduced suction power, visible damage like tears or holes, and filters that remain discolored even after thorough cleaning.
Troubleshooting Common Cleaning Issues
Sometimes your Tineco might display error messages or exhibit performance issues related to cleanliness. Understanding these problems helps you address them quickly.
“Clean Dirty Water Tank” Message When Tank Is Empty
This frustrating error often occurs due to dirty sensors rather than a full tank. Remove the dirty water tank and inspect the sensors inside the vacuum cavity—they’re typically small metal contacts. Use a soft, dry cloth or alcohol wipe to clean these sensors thoroughly.
Check the air channel opening located underneath where the dirty water tank sits. Use the cleaning tool to remove any blockages in this area, as debris can trigger false full-tank warnings.
Reduced Suction Power
If your Tineco isn’t picking up dirt effectively, first check for clogs in the brush roller area. Remove the roller and cover, then inspect the chamber for accumulated hair or debris. Clean this area thoroughly with the included brush tool.
Verify that filters are clean and completely dry. A damp or clogged filter significantly reduces suction. Also check that the dirty water tank isn’t full—when water reaches the max line, suction automatically decreases.
Persistent Odors
If your Tineco smells unpleasant despite regular cleaning, try these solutions. After each use, completely empty both water tanks and leave them open to air dry. Remove the brush roller and allow it to dry separately from the machine.
For stubborn odors in the roller, soak it in a solution of white vinegar and water (1:3 ratio) for 15 minutes, then rinse thoroughly. Some users successfully add scent beads to the clean water tank for a fresh smell—though this isn’t officially recommended by Tineco.
Self-Cleaning Mode Won’t Activate
If the self-cleaning function doesn’t start, verify these basics: ensure the vacuum is properly seated on the charging base, check that the clean water tank is at least one-third full, confirm the dirty water tank isn’t full or improperly installed, and make sure the vacuum is plugged in and receiving power.
If these checks don’t resolve the issue, try holding the self-cleaning button for several seconds rather than just pressing it briefly.
Preventive Maintenance Tips for Longevity
Beyond regular cleaning, these practices help maximize your Tineco’s lifespan and performance.
After Every Use
Run the self-cleaning cycle immediately after finishing your floor cleaning. Empty both water tanks completely and leave them open to air dry. Give the brush roller and roller cover a quick visual inspection, removing any obvious large debris.
Weekly Tasks
Remove and rinse the dirty water tank filter thoroughly. Wipe down the exterior of your vacuum with a damp cloth. Check for any blockages in the nozzle and spray holes.
Monthly Maintenance
Deep clean the brush roller following the full removal and washing process. Clean the clean water tank with vinegar solution to prevent mineral buildup. Inspect the filter and clean or replace as needed. Check all seals and gaskets for wear or damage.
Storage Best Practices
Store your Tineco in a cool, dry location away from direct sunlight. Always store the vacuum upright on its charging base to prevent dirty water from flowing back into the motor. Leave the dirty water tank lid open slightly when stored to allow air circulation and prevent moisture buildup.
Model-Specific Cleaning Considerations
While most Tineco wet dry vacuums share similar maintenance procedures, some models have unique features worth noting.
Floor One S5, S6, and S7 Series
These advanced models feature iLoop smart sensors that detect dirt levels. Keep the sensor area clean by wiping the digital display and sensor windows with a soft, dry cloth. The S7 models with steam function require descaling every few months if you use tap water.
iFloor Series (iFloor 3, iFloor 3 Breeze)
These more basic models have simpler components but require the same diligent cleaning schedule. The iFloor series benefits especially from the storage tray, which is specifically designed to facilitate the self-cleaning process.
Stretch and Switch Models
Models with articulating heads or convertible designs may have additional joints that accumulate debris. Periodically wipe these moving parts with a damp cloth to ensure smooth operation.
Replacement Parts and When to Replace Them
Even with excellent maintenance, certain Tineco components will eventually need replacement.
Brush Roller Replacement Timeline
Most users should replace brush rollers every 3-6 months depending on usage patterns. Heavy use (daily cleaning, multiple pets, large homes) requires replacement every 3 months. Moderate use (2-3 times weekly) extends this to 4-5 months. Light use (weekly cleaning, small spaces) may last 6 months.
Signs you need a new roller include frayed or missing bristles, visible cracks or warping in the roller body, rollers that constantly tangle despite regular cleaning, and unusual noises or motor strain during operation.
Filter Replacement
Replace filters every 3-6 months or sooner if they show damage. Keep a spare filter on hand—many Tineco models include one with purchase.
Where to Buy Genuine Parts
Purchase replacement parts from official sources to ensure compatibility and quality. Tineco’s official website offers all genuine replacement parts. Authorized retailers like Amazon, Best Buy, and Walmart stock Tineco parts. Always verify that parts are compatible with your specific model number.
Frequently Asked Questions
How often should I clean my Tineco wet dry vacuum?
You should perform basic maintenance after every use, including running the self-cleaning cycle and emptying both water tanks. Deep clean the brush roller and dirty water tank weekly if you use your Tineco daily, or monthly for less frequent use. Replace filters every 3-6 months depending on usage intensity.
Can I use bleach or harsh chemicals to clean my Tineco?
No, avoid using bleach, harsh chemicals, or abrasive cleaners on your Tineco vacuum. These substances can damage plastic components, degrade seals, and harm the motor. Stick to mild dish soap, white vinegar solutions, and water. Always use Tineco’s recommended cleaning solution in the clean water tank for best results.
Why does my Tineco still smell bad after cleaning?
Persistent odors usually stem from insufficient drying of components. Ensure the brush roller, filters, and water tanks dry completely before reassembly—this typically takes 24 hours. Deep clean the brush roller monthly with a vinegar solution for stubborn smells. Also check hidden areas like the roller chamber and air channels for trapped debris.
Can I put Tineco parts in the dishwasher?
No, dishwasher heat can warp plastic components and damage electronic parts. Always hand wash Tineco components with lukewarm water and mild soap, then air dry completely. The high temperatures in dishwashers exceed the recommended maximum of 104°F (40°C) and can cause permanent damage.
Conclusion: Keep Your Tineco Running Like New
Learning how to clean Tineco wet dry vacuum properly is one of the best investments you can make in your cleaning routine. With just a few minutes of maintenance after each use and regular deep cleaning sessions, your Tineco will continue delivering spotless floors and powerful performance for years to come.
Remember the three pillars of Tineco maintenance: use the self-cleaning mode after every session, deep clean components weekly or monthly depending on usage, and replace parts when they show wear. By following this comprehensive guide, you’ll prevent odors, maintain optimal suction, and extend your vacuum’s lifespan significantly.
Your Tineco wet dry vacuum is designed to make cleaning easier—don’t let inadequate maintenance turn it into a source of frustration. Set reminders for regular deep cleaning sessions, keep spare filters on hand, and always allow components to dry completely. With proper care, your Tineco will remain your trusted cleaning companion, keeping your home fresh, clean, and healthy.